Troubleshoot Calving Issues
Veterinarian offers advice on dealing with complicated births.
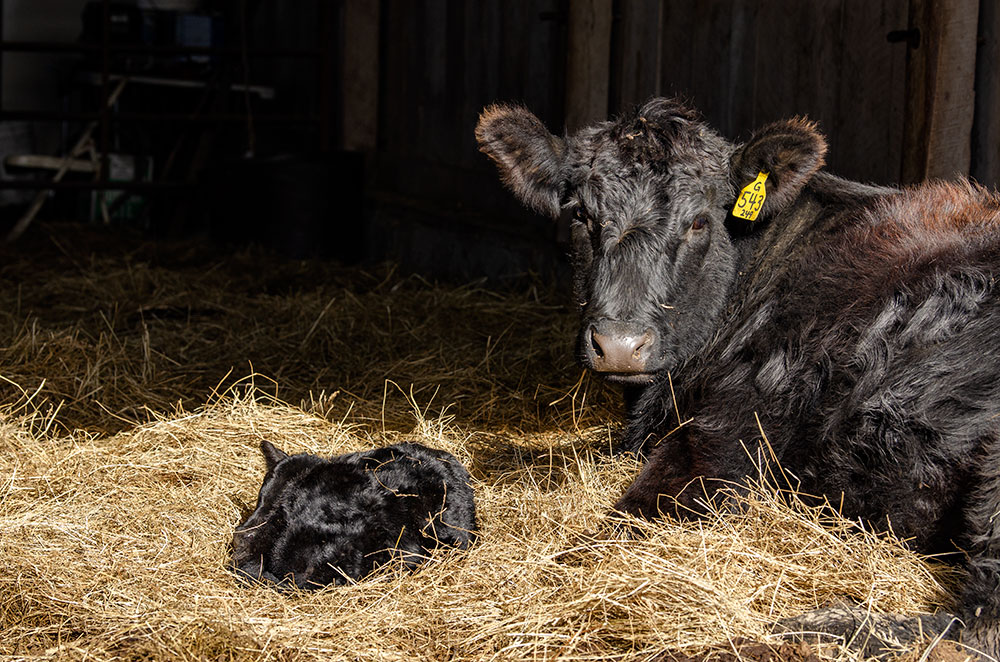
A cow-calf operation’s ultimate goal is a live calf, but it’s also crucial to save the cow or heifer if there is an issue. Kansas State University Extension Beef Veterinarian and Assistant Professor AJ Tarpoff explains several malpresentations and offers tips on how to correct them.
Don’t intervene unless there hasn’t been progress for one hour for cows or two hours for heifers, he says. The first thing is if you reach in and you can’t identify what’s wrong, then call for help sooner than later. Time is of the essence.
If you decide to intervene, use lubrication.
“Lubrication is your best friend in any calving situation,” Tarpoff says. “Friction equals inflammation equals swelling. OB lube makes everything easier and faster.”
Warm the lube first, because cold lube makes the uterus contract. Tarpoff suggests keeping warmed lube in a cooler instead of a calving-kit bucket. The cooler could also store chain handles and gloves during the off season.
He recommends taking a handful of lube and wetting the entire birth canal and even the calf’s head if it feels dry when starting your intervention.
However, his caveat is to avoid making a bad situation worse. Know your own limitations to ensure a C-section remains a viable option. If you have been inside the cow for more than a half hour with no progress, call the veterinarian. Additional inflammation makes everything harder.
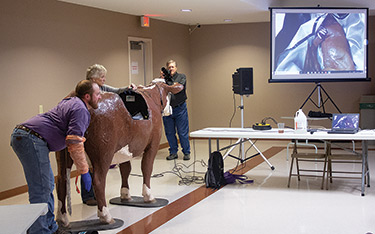 |
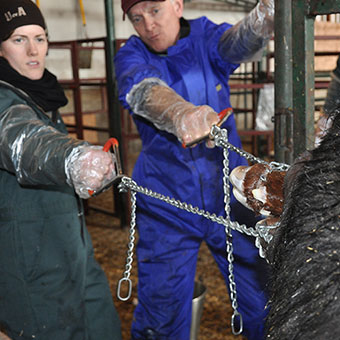
Using life-size cow and calf dummies and a camera, AJ Tarpoff was able to demonstrate what calving looks like on both the outside and the inside. If you look carefully at the screen to the right, you can see his gloved hand at the calf’s elbow working to bring the leg around. [Photo by Kasey Brown] |
One thing to note if a female does become a C-section candidate, J-lube — which might be the slickest material known to man, Tarpoff quips — can be incredibly toxic and irritative to the peritoneal cavity.
When feeling with your fingers when you reach in, you’re looking for two feet and a nose, with the feet below the nose. The toes should be pointed down. Tarpoff explains that the calf’s elbow sits on the bottom side of the pelvis. When it gets over the ridge or brim of the pelvic bone, the calf extends its elbows much like when a person dives into a swimming pool.
“If the head is back, the number one reason is that the calf is too big. You can’t pull a calf if the head is not with the legs. Also, never try to pull three feet,” he notes.
Hard situations
-
One leg back
If one leg is back, Tarpoff says to trace to key landmarks. Trace to the armpit and work down. When in doubt, back up and look at the cow’s anatomy as a guide.When you find the elbow and cannon bone, cover the hoof with your hands. The No. 1 reason for tears below the pelvic brim are from the calf’s hooves. Once you cover the hoof, flex the fetlock and elbow and pull up. It must go through the center. The uterus is a bag that goes down; there is no space side to side. He recommends always having a point of contact with a strap or chain if one foot is already out.
Once the calf is out to its navel, he suggests using your arm in a wrestler-esque “half-Nelson” to twist the calf sideways so the hips are more vertical. This should let the hips slide out more easily.
Remember that a calf is naturally in an arc, like it’s jumping over a fence, when it is born. The puller needs to match the arc.
-
Breech
If you reach in and feel a tail, he jokes, call the vet. In seriousness, he suggests checking for feet, but know that it will be tight. Since the calf is backward, the mechanical pressures to cause dilation weren’t complete, so the cervix is tighter than it should be. Push the calf’s rear end up toward the cow’s spine to get more room to reach the back legs. Time your manipulations when the cow is pushing, and remember to use your legs to lift the calf, not your back.The hocks come back after the calf is raised. Bring the hocks closer to the bottom of the pelvis. When the hock is at the pelvic brim, push it up and forward to create space. Reach down to the inside and cover the hoof with your hand. Then flex the fetlock, and flex every joint together. Once it pops out, get a handle on it and then feel in along the groin to get the second leg.
When a calf is backward, the umbilical cord gets pressed against the pelvic brim much earlier in the calving process — once the stifle comes through the birth canal. The umbilical cord is the connection to the mother and gives oxygen and blood to the calf. Since the connection breaks earlier, a timely birth is imperative.
Once the stifle is out, pull up and out, or at least parallel with the birth canal. This will protect the calf’s ribs as it passes through the birth canal.
Tube feeding
If you have to tube-feed a calf, Tarpoff explains, the esophagus is on the left side of the calf. The trachea is the hard cartilage tube in the center. If you put your thumb at the base of the calf’s jaw, you’ll feel a soft area. You can feel the ball at the end of the tube pass by your thumb, so you know it’s in the right place.To aid in swallowing, measure the amount of tubing along the jawline before putting it in the calf’s mouth. This lets you know it’s the right amount of tube so you don’t push too much through too quickly, and it goes down more easily because the calf will swallow it. A tubed calf will need at least two feedings because a calf’s stomach cannot fit a gallon of liquid.
Tools to help
Calf puller
Many cattlemen have used a calf puller, but few understand why there is (or was, in most cases) a string on the top of it, Tarpoff says. It’s a measurement tool so the puller doesn’t get placed too low on the cow. Place the puller too low and a cow’s leg tendons can be damaged.When using a puller, there should only be as much pressure applied as one person can pull with all their weight. The calf puller has the potential to produce pressure in thousands of pounds. It’s just a big lever. It should be used in small increments — no big pulls, Tarpoff emphasizes. Slow and steady works best with the calf puller.
Remember that a calf is naturally in an arc, like it’s jumping over a fence, when it is born. The puller needs to match the arc. So, the puller needs to be parallel with the ground until the calf’s shoulders are out, then lower the puller’s end. If the calf is backward, pull up and out to protect the ribs from the cow’s pelvis.
When using a puller, there should only be as much pressure applied as one person can pull with all their weight.
Chains or straps
Tarpoff says he will use either chains or straps, but says it comes down to personal preference. He suggests keeping several pairs of either tool around. With chains, they will wear down and become rusty. Keeping both clean is of utmost importance. Clean chains every time and dry them completely. He suggests using iodine or chlorhexidine solution to clean them. Store completely dry chains in zipper-locked bags to keep them clean.Straps are lighter and can be easier to handle. However, they can get slick quickly and might feel awkward. Straps have loops where you can attach handles. This gives one point of contact. The wider band is designed for more give and take, so don’t use sustained pressure when using straps.
He does warn that straps are nearly impossible to completely disinfect, but you can get close. They also take longer to dry, so make sure they are completely dry before storing.
When using a chain or strap, never attach it to yourself. He recommends holding it on a hand that can come off quickly if necessary, like stringing it around his thumb and pinky with the chain along his palm.
Attach the chain or strap above the fetlock joint, and for chains have another point of contact below the fetlock using a half-hitch “knot.” Two points of contact puts equal forces of pressure on the leg. If the chain is above the fetlock without a second point of contact, then it can hit the growth plate or could even break the calf’s leg.
Head snare
Tarpoff emphasizes that a head snare is meant to help change direction of the head. It is not for pulling. Because of the placement of the snare at a certain point on the cranium, pulling on the snare could damage the brain stem and respiratory signals.
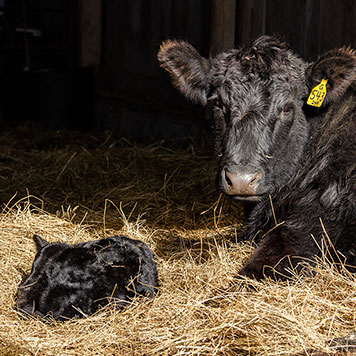
Editor's note: Lead photo taken by Shauna Rose Hermel.